


The TouchWin TH project planning tool
Here you can see the TouchWin project planning tool. On the left you will find the project tree with the various screens. I have moved the function menus to the right-hand side so that I can explain them better afterwards. In the system menu at the top under "Tools" then "Options" you will find some settings for the Edit Tool, you can configure your touch panel under "File" then "Settings".
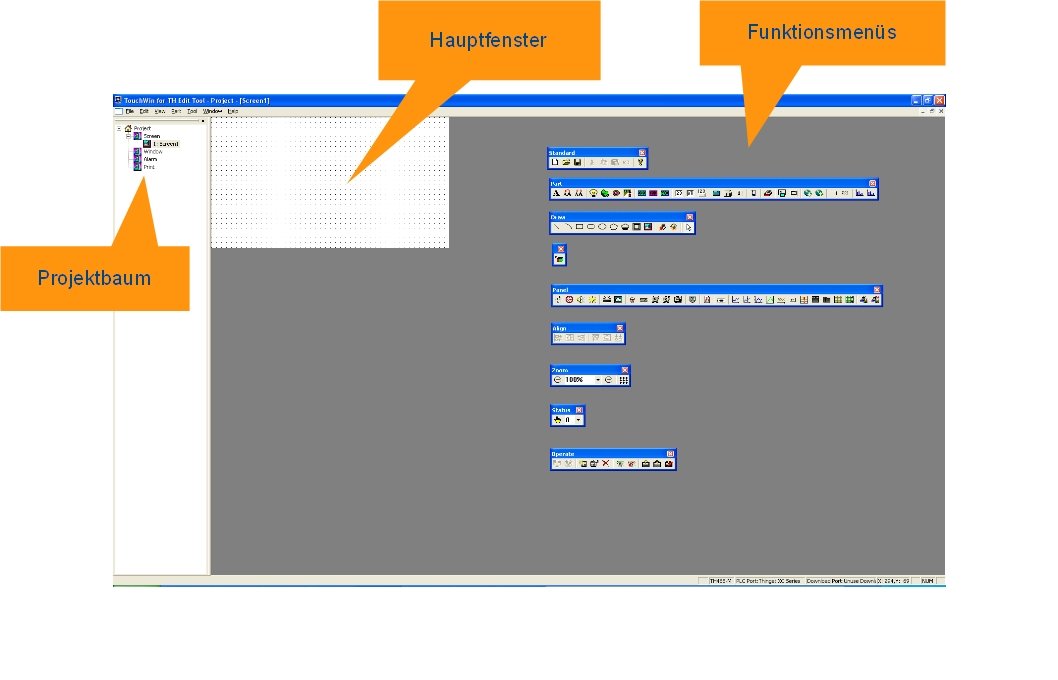
The project tree
You will find the following elements in the project tree:
Screen
Here you will find the various images. Right-click to add new images or change their name and background color.
Window
Windows are pop-up windows that can be used to display a keyboard or a mask for a valve control, for example.
Alarm
Alarms are pop-up messages that are intended to indicate a problem. By default, they have an OK button to close them.
Window for printouts.
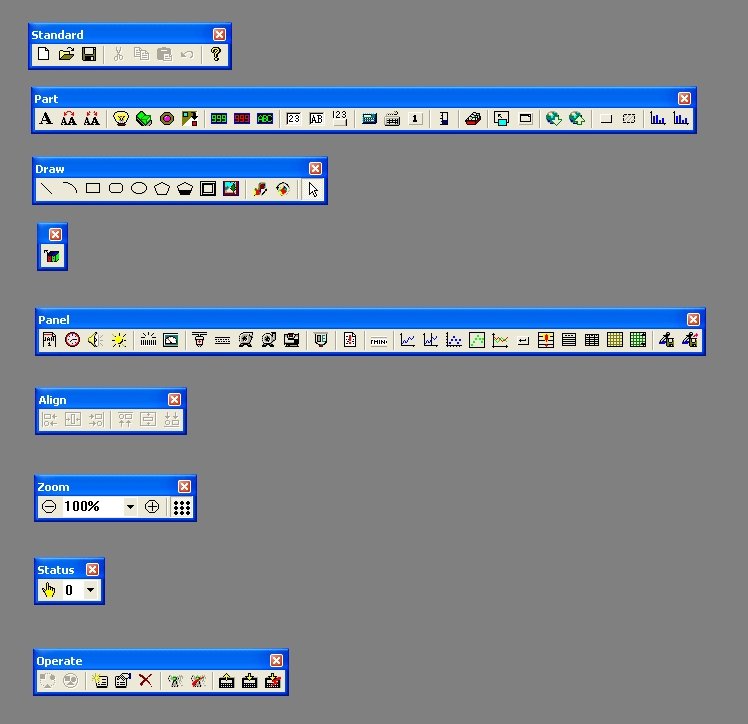
The function menus
Here is a description of the function menus:
Standard
Standard functions such as New project, Load, Save, Copy and Paste.
Part
A collection of important standard elements such as animated text, lamps, input fields, image change fields and others. The standard elements are described in more detail in chapter 4.
Draw
Objects for drawing your own graphics, such as lines, curves, rectangles or bitmaps. You will also find two functions for animating the movement or rotation of any objects here.
Image library
This single button takes you to the image library. Here you will find a very extensive collection of images and graphics and can add your own.
Panel
A series of very useful objects such as trends or tables, which will be discussed in more detail in later chapters.
Align
Here you will find buttons to align objects to a line.
Zoom
Useful tools to zoom in on images and to activate the positioning grid. The zoom function is very helpful for the exact positioning of objects.
Status
Also a very useful tool for displaying how objects look when they are pressed and how objects animated by index look when their data source assumes certain values.
Operate
Here you will find functions for simulation and download. There are also two interesting buttons on the left-hand side that mark objects as "public" or "private". Objects with the attribute "public" are available on all screens, "private" objects only on their own. This is very useful for calendars, clocks and navigation menus.
Now that you have become familiar with the project planning tool, we can take a look at the connection of data and the internal data areas in the next chapter.